![]()
This is one of those things that graphic artists never want to explain to editors. Alpha mattes are the key to integrating photoshop and video together. What an alpha matte does is select an area to be clear when its imported. For this tutorial we are going to be working with Photoshop 5.0 and Avid. If your editing on something else too bad...but at least the Photoshop aspect will be useful.
The first step is to load in your pic and clean it up. This isnt a photoshop learning center (yet) so I am going to leave this up to you. Next clean up you image and put it on its own layer. If you can't manage this then this tutorial may be a little too advance for you. You should have an image/text on its own layer and a background.
Seeing as how I forgot to take screen captures of the layers box, I hope you have managed
to do this. If this is too hard for you then try this. Make a new project
(720x540 pixels, white background) and then type in some text. The text should be on
its own layer. From now on just imagine that the text is the same as the house and keep
following along :) The advanced class can continue with the pictures :)
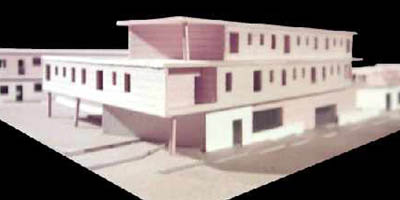
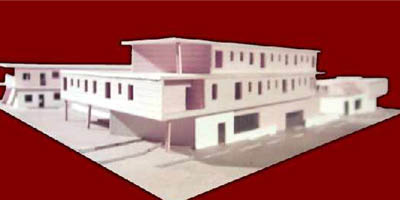
The next step is to pick the correct background color. This is the tricky part of this lesson....the background MUST match what the transparency is. Lets take this house for example:
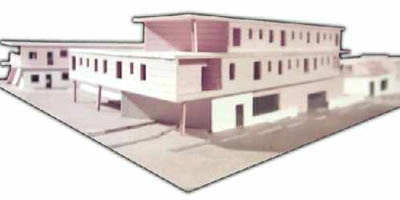
The house has a nice feathered edge on it (why thank you I made it myself :p ) I
want this edge to be slightly transparent in the Avid. This way it will be dark and
feather out into the video. The problem is the background is white. Since the
black is going to be transparent I need to have the background black. I have NO
ideal why it has to be this way but if you don't do this then you will get a weird outline
when you import.
So here I changed my background layer (not on the object/text layer mind you...just the background layer) to black to match the black feather. If you have no transparency at all then most any color will work, but black is the best choice followed by white.
It now looks like the feather is gone...don't worry! The feather is all fine and dandy
because its on its own layer (with the object). What we want to do now is mask the
layer off. The first thing we do is select the object layer...be careful b/c if you
just changed your background color then you are on the background layer.
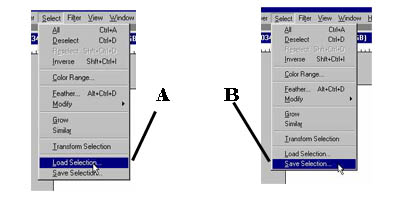
After you load selection another menu will pop up:
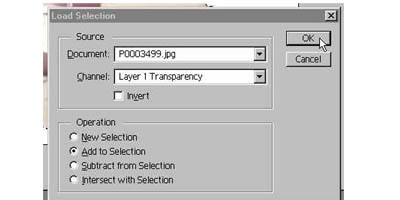
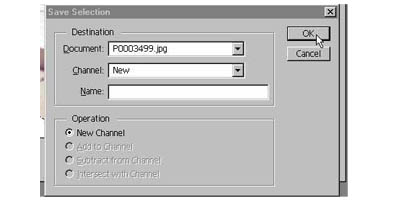
Just hit ok...no need to name or anything. Next go to save selection:
and ANOTHER window pops up. Once again there is no need to do anything but hit
enter.
you should now see the same thing you saw before you started, except in the channels
window...
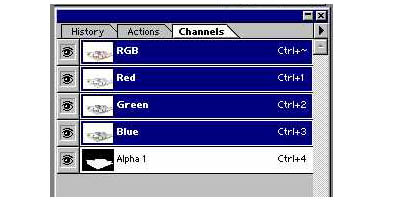
Select that bad boy and the screen will change colors for you.
Notice how you can see the fuzz again? You don't need to turn on the alpha for it to
work, but it is a smart thing to do for proofing. This way you can see what was
matted before the whole import process. Often with things like text you'll see that
you forgot to select the inside of letters (like 0's & B's) so this is the best time
to catch that error.
Now you save your file:
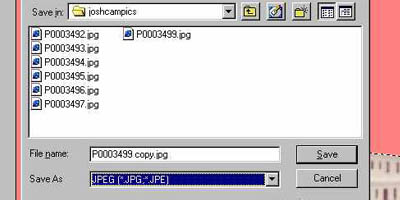
Whatever you do..don't save that as a Jpeg!!!! Ideally you save it as a photoshop
file. Avid imports it fine and its easy to go back and edit the picture. If
you cant use photoshop you must use a 24bit or 32bit format. Standard formats that
support alpha mattes are .bmp, .pict, and .tiff. Most formats do not support alphas
so try to stick with these, but photoshop format is the BEST b/c you can edit it easier
later. The other formats wont retain your layers b/c they flatten everything
AUTOMATICALLY.
Now when you make alpha's the Video Slave way you have to import the Video Slave way. The downside is I don't own an avid and I refuse to go into work and make screen shots :( The good news is I think I can remember! In your project select a target bin, go to File>Import and select your file. BEFORE you hit open tho, click on the options. You should see options that say things like auto-detect sequences, ignore alpha, invert alpha. Make sure ignore alpha is NOT checked (very important) and then select invert alpha. Then hit ok and import. In your bin you should see the picture with the words (w/alpha) by it...if you don't you messed up. If the background is white when you open the picture you messed up. This 99.9% of the time means that you didn't invert your alpha on import. If it has a funny shadow around it then that means you have the background color incorrect...you must have the background color the same as the transparent parts.
Other things to think about are layers...you can only have ONE alpha. I understand that when you make cg you have upwards of 50+ layers. The trick is to merge your layers together and then make one alpha matte. Just make sure you save a copy somewhere with everything separate :)
I know you probably are going to run into issues I didn't cover here but I really can't help you much more than this. This is my first tutorial and it's giving me a splitting headache. Ideally you can go into the forums section and ask for help there if you still are having problems. My hope is that if you didn't know how alpha's where made, this would be enough to get you going in the correct direction....have fun!